Once you’ve created the stops for your tour, it’s time to arrange them in order, and add some information that’s important to users, like how long the walk for the tour is and how long it will take for them to complete the whole tour. Again, the website provides tools to help with figuring these things out. You can also provide a description of the tour, one or more images to help give users an idea of what the tour is about, and even add a logo for your organization if desired.
Create a tour
1. Choose Create New Tour in the Tours menu.

2. This brings up a page for editing a tour. As with editing a stop, there are sections for the required components of a tour: a description (with optional images), some information about the tour (e.g., duration), and a list of stops.
3. Editing the title and content of the page is the same for a tour as it is for editing a stop. The difference is that what you write here is a description of the whole tour, and should help get potential users interested in taking the tour.
Tour information
4. The Tour information section includes information included in all tours: a title, a brief description, the city where it is, the estimated time to take it, the estimated distance, and whether it is a walking or biking tour.
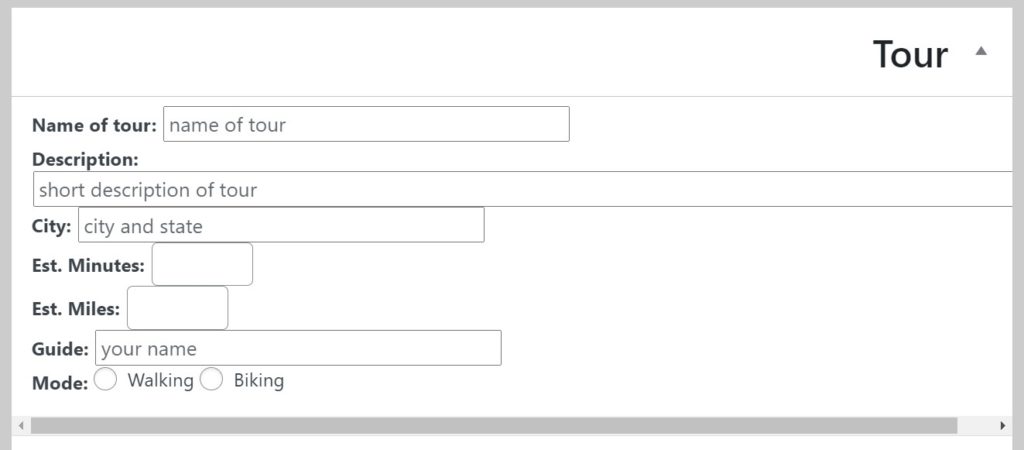
5. The name and description need to be brief, but descriptive—they are how your tour will be referenced in a list of tours. So the name should be more than just the neighborhood or topic, but very briefly tell people what the tour is about. For example, Chinatown Murals, Jingletown History, The Scourge of Freeways, or whatever your tour is focused on.
6. Setting the city will help the site admins organize your tour so it can be found by users.
7. The estimated minutes and estimated miles are what they sound like: how long an average person will take to complete the tour, and how far they’ll walk. But don’t worry about figuring these out yet—there are tools available to help you.
8. The Guide field should contain your name, or your organization’s name.
9. Finally, set the Mode to Walking or Biking as appropriate.
Pull out all the stops
Now comes the fun part—actually arranging the stops into order for a tour. Much of this won’t make sense unless you have 4 or 5 stops already created, but there are already dozens of stops defined for Oakland, so you can create a tour using those.
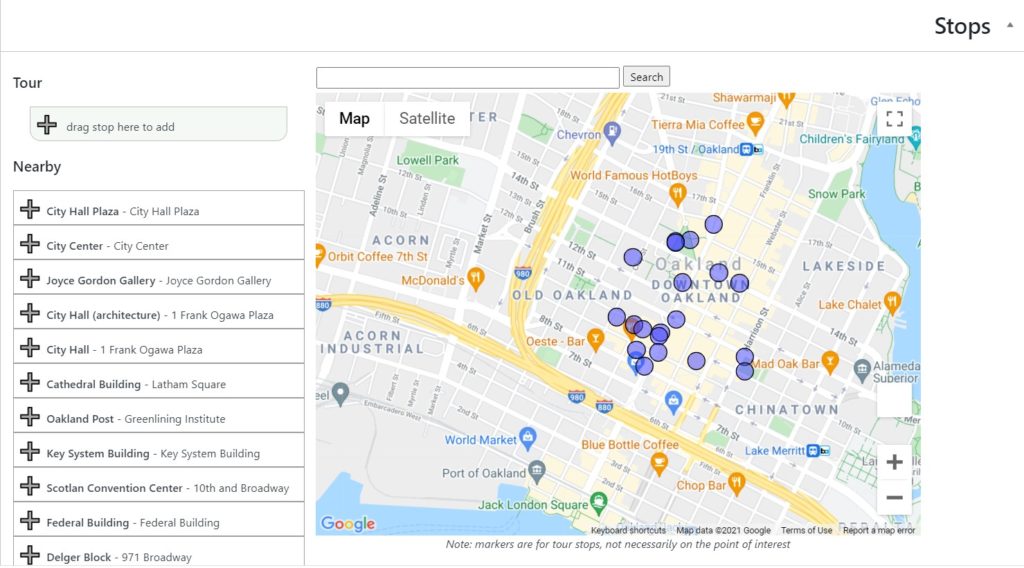
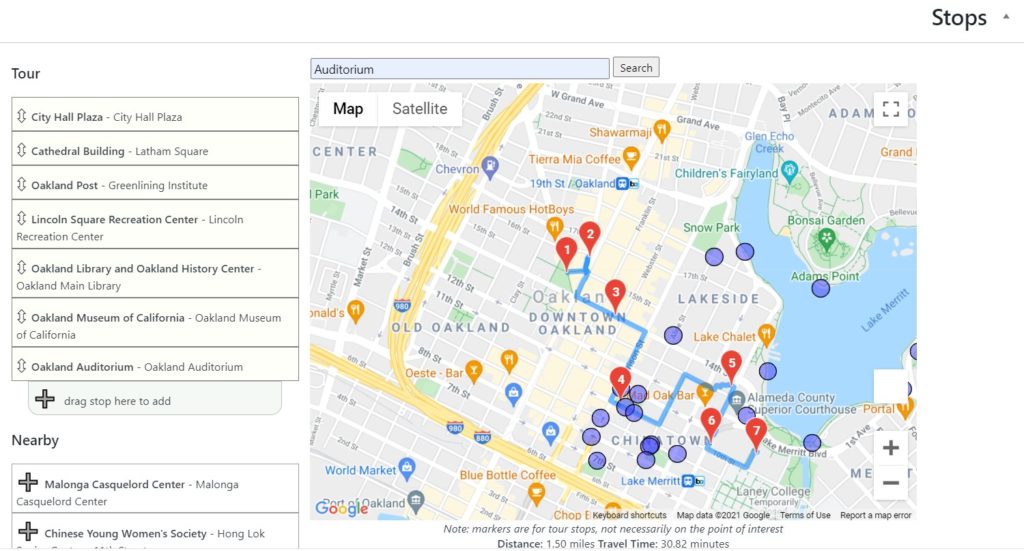
The Stops section has 3 main parts: a list of stops on the tour, in order; a list of nearby stops that aren’t on the tour; and a map. The map shows both the stops (if any) on the tour and the nearby stops that aren’t on the tour. The map also lets you search stops that may be further away.
Adding stops to the tour
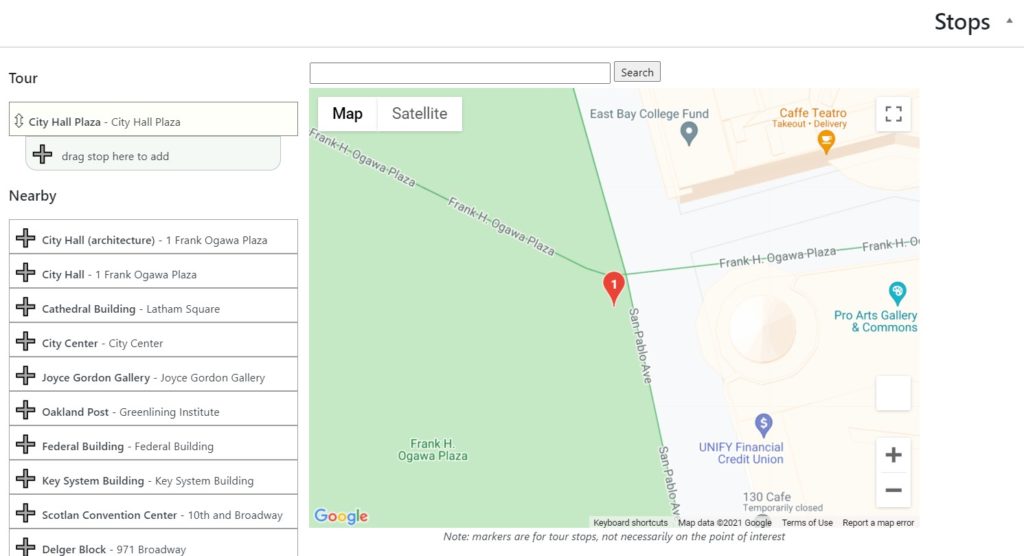
To add a stop to the tour, click on the stop in the Nearby list and drag it up to the Tour list, and drop it on + drag stop here to add. The stop is removed from the Nearby list and added to the Tour list. It also appears on the map with a red marker showing its number within the tour.
To add the next stop, repeat the process by dragging another stop from the Nearby list to the Tour list. Again the stop is added to the the tour and to the map, but this time it also draws a walking route between the stops.
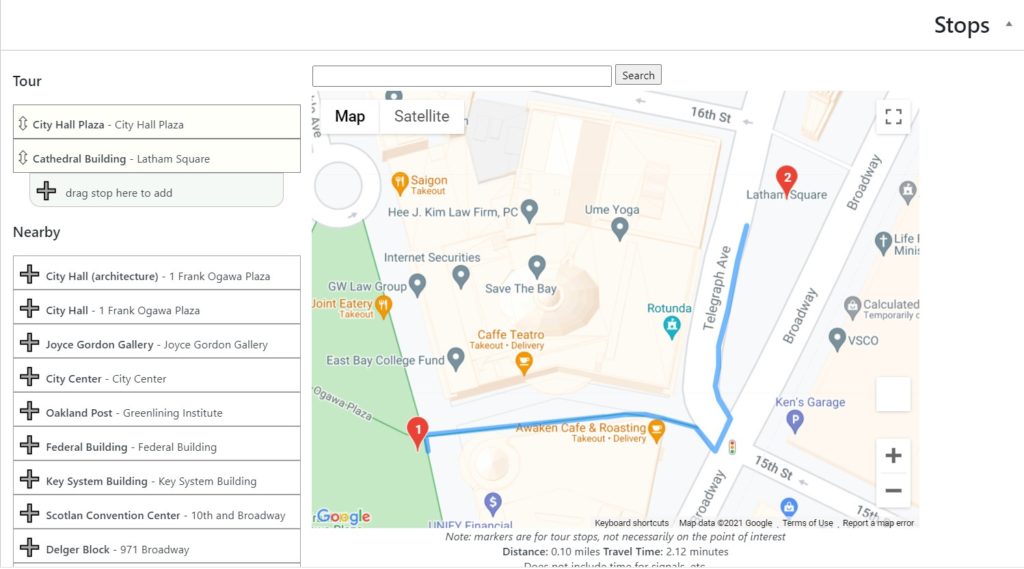
Also notice that below the map, it has calculated the Distance and estimated the Travel Time. As noted, the travel time does not include the time you might spend waiting for a signal to change before crossing a street or other delays. It also does not include the amount of time you’ll spend at a stop, because that depends on how much information is on the page for that stop and whether it has any audio.
You can continue adding stops until you’ve added all the stops you want. If there’s a stop you want to add and you don’t see it on the Nearby list, try searching for it or a nearby location on the map, and the list will be updated.
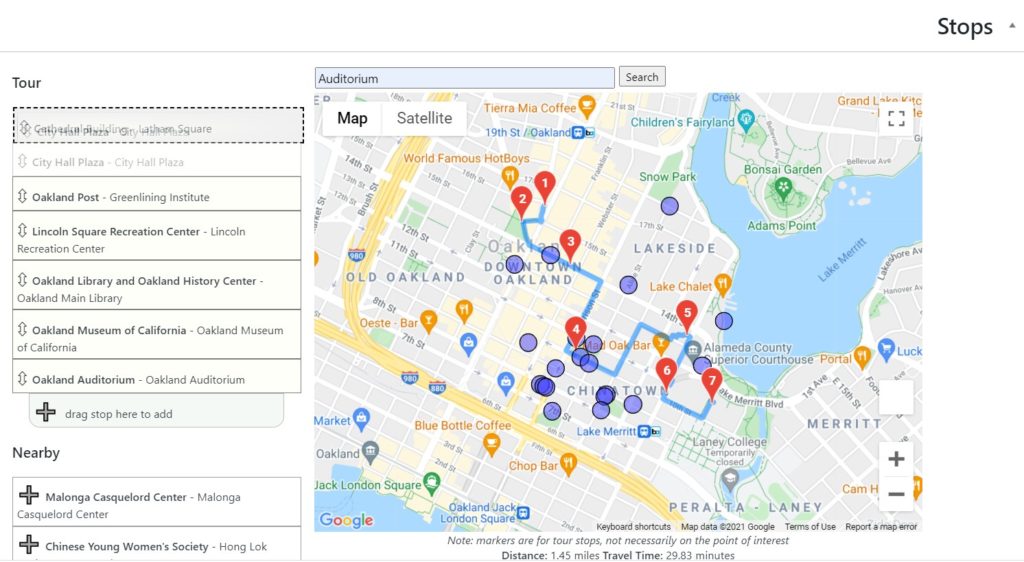
Removing and reordering stops
To remove a stop from the tour, reverse what you did to add it. Click on the stop in the Tour list, then drag it down to the Nearby list and drop it. It will change from a numbered stop on the map to a blue circle, and the app will recalculate the route, the distance, and the travel time.
Changing the order of the stops is similar to adding or removing one. Click on a stop in the Tour list, then drag it to where you want it in the tour. Want it as the first stop? Drag it to the top and drop it. Want it as the last stop? Drag it to the bottom and drop it on + drag stop here to add. As you drag the stop up and down, the list will highlight where the stop will go when you drop it.
You can continue adding, reordering, and removing stops as needed. And you can save the tour as a draft and come back to it later.
More features
There are some advanced features you might want use for your tour, but they aren’t needed for most tours. You can skip the section on advanced features if you want.
Next: Advanced features
- Create your own walking tour
- Create a page for each stop
- Create a page for the tour
- Advanced features
- Test and publish your tour