Most tours won’t need multiple parts or a custom look for the tour, but some pre-defined CSS (Cascading Style Sheet) classes can be useful for formatting special parts of your tour stops so they are consistent with other tour stops.
Special CSS classes
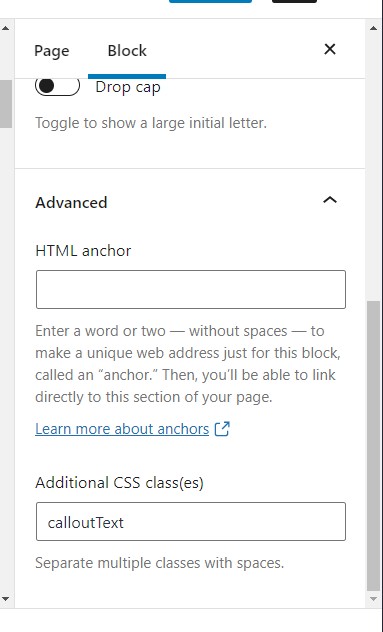
You can apply existing CSS classes to a block within a page for a tour or a stop by going into the Advanced section for the block and adding the name of the CSS class in the Additional CSS class(es) field:
Here are some special CSS classes you might find useful:
calloutText – Sometimes you need to call special attention to something, especially with regards to safety. The class puts a thicker border around the paragraph and a light green color to call more attention to it.
Note: This is a paragraph with the calloutText class added.
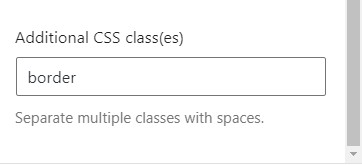
border – This puts a thin border around a figure (the image and caption together) or other block, and makes the background off white. Most images don’t need it, but it can be helpful for images that are a similar color to the background of your pages.
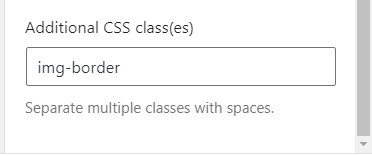
img-border – This is similar to border, but puts the border around just the image, not the entire figure.
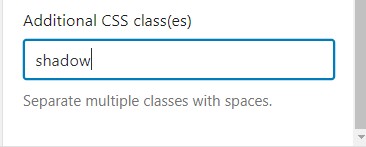
shadow – Puts a soft shadow around the block.
img-shadow – Puts a soft shadow around just the image within a figure.

Note: The styles from additional CSS classes generally will not appear while you’re editing a tour page or a stop page. They should appear when you preview a page and when you view it normally, but note that the class names must match exactly–CalloutText is not the same as calloutText.
Multi-part tours
Walking tours generally last anywhere from 60 minutes to 150 minutes (2.5 hours). Sometimes you’ll have more information than will fit in a single tour, or want to cover a longer distance than people will generally walk for a single tour.
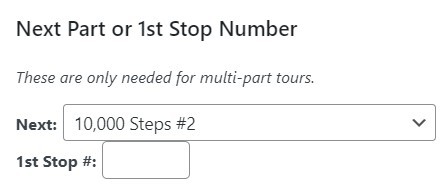
In those cases, you can break your tour up into 2 or more parts. The tour editing page lets you specify the next tour in a series:
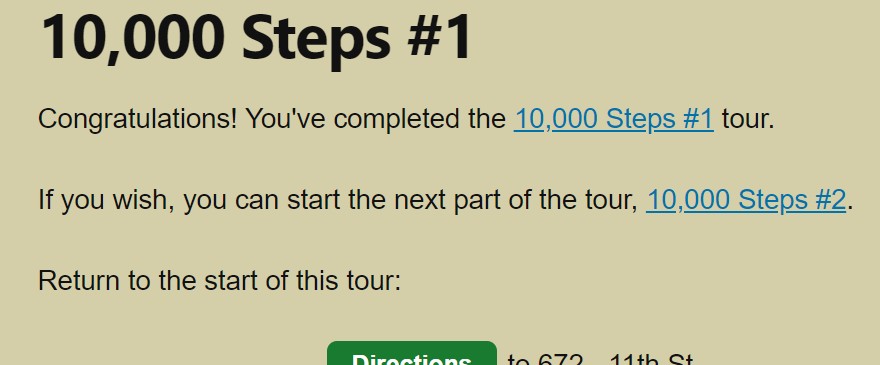
When someone completes the first part of a tour, the app will automatically provide a link to the next part:
The app also lets you specify where to start numbering the stops. Normally stops start at 1, but for a multi-part tour, it’s nice to have the stop numbers sequential so people know how far along they are within both the current part and the overall tour. In this case, this part of the tour has no next part (it’s the last part), so that should be set to none. The first part has 18 stops, so the first stop of the second part is 19:
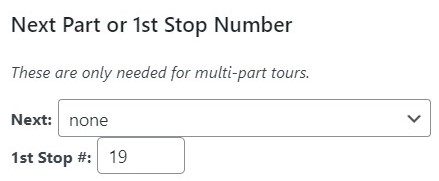
Note that the other parts of the tour have to exist before you can link to them from the earlier parts, and they need to have a non-zero 1st stop # set.
Custom look with custom CSS
By default, tours will use the same design scheme as other tours. The scheme is designed to be easily viewed on phones and other mobile devices with smaller screens.
But you might want your tours to have a certain look to them, and maybe feature your project or organization’s logo.
The tour editing page lets you specify custom CSS which is automatically applied to the pages in your tour. CSS (Cascading Style Sheets) are part of modern web pages, and make it easier to make things consistent from page to page by specifying the style for common elements like text, images, web links, etc. You can change colors, fonts, and more.
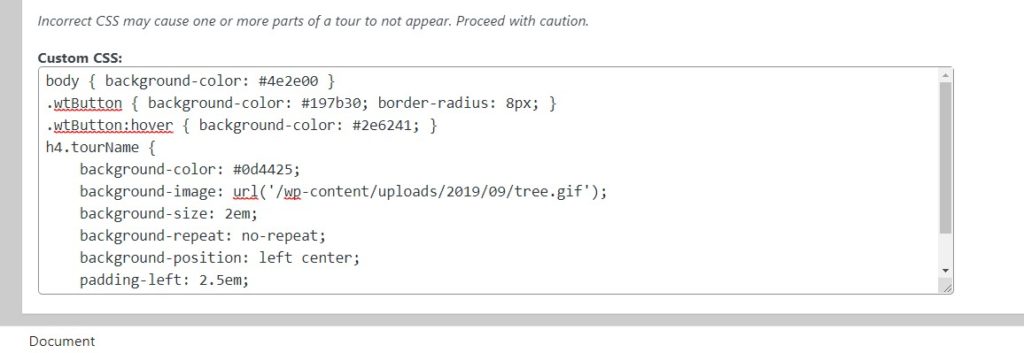
For example, you could set the background color of the banner that appears at the top of each stop to a dark green by adding the following CSS:
h4.tourName {
    background-color: #0d4425;
}
One challenge is figuring out the class of the element you want to customize. The developer tools provided in Chrome, Brave, and other browsers are very helpful for this. They let you inspect the elements on a page and find out their names and the current CSS.
Understanding CSS can get complicated, so we won’t try explaining it all here.
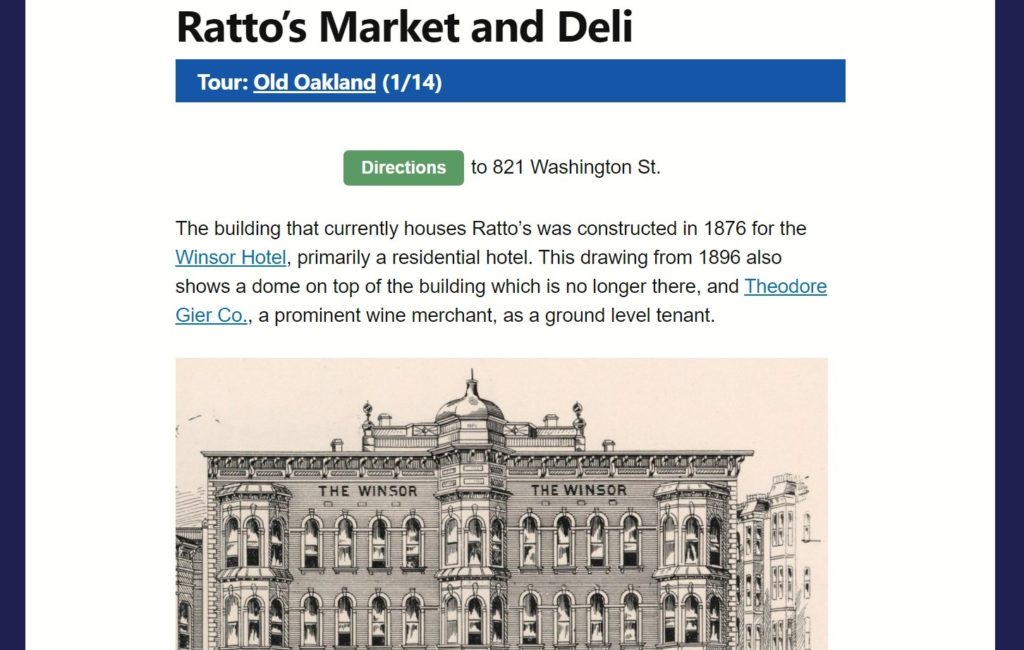
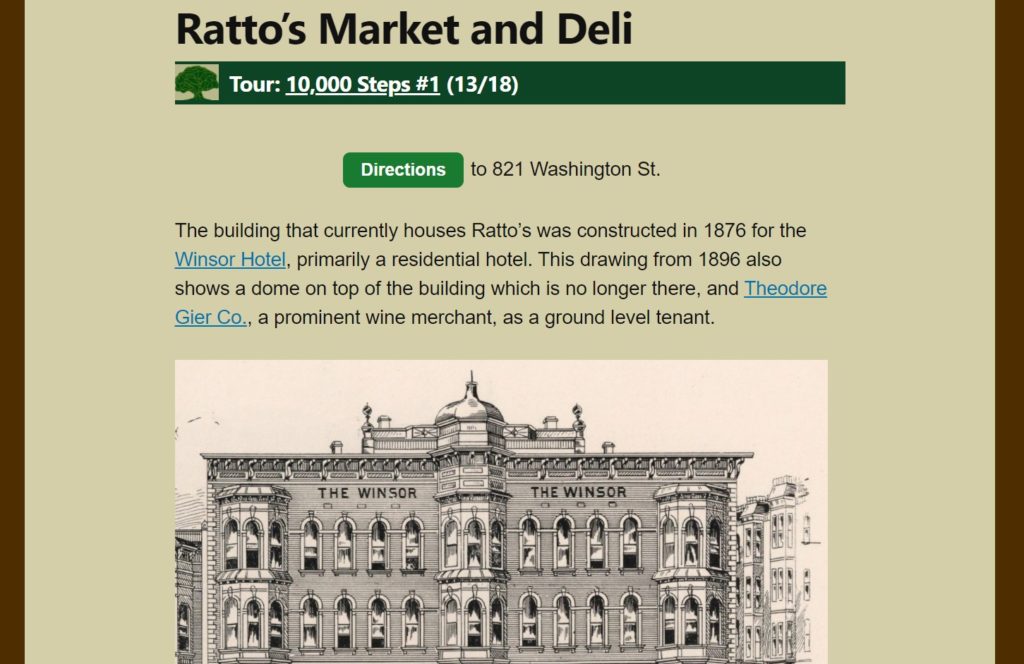
But it’s important to remember that the custom CSS is part of the tour, not the stops. So the same stop (like Ratto’s Market and Deli above) can appear differently when it’s included in different tours. A page for a stop can include its own formatting, but the more you can define in the custom CSS for the tour, the easier it will be to make the stops look consistent.
It’s also very important to remember that the wrong CSS can keep your tour from being readable, so use custom CSS for tours with care!