Each stop on a tour has a page associated with it, and needs to have three things: a title, some content like text and pictures, and a location.
Create a stop
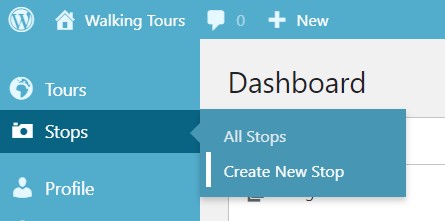
1. Choose Create New Stop in the Stops menu.
2. This brings up a page for editing a stop, with sections for the required components of a stop: a title, some content (text, images, audio, etc.), and a location.
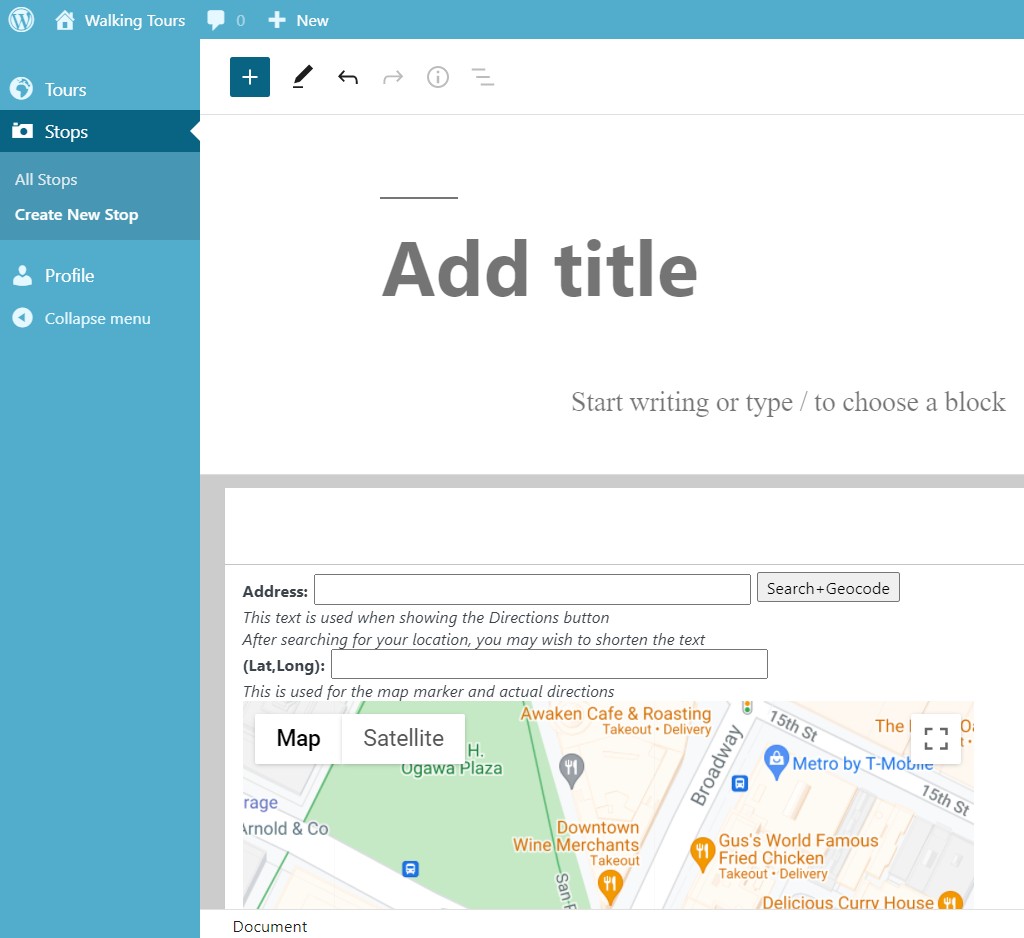
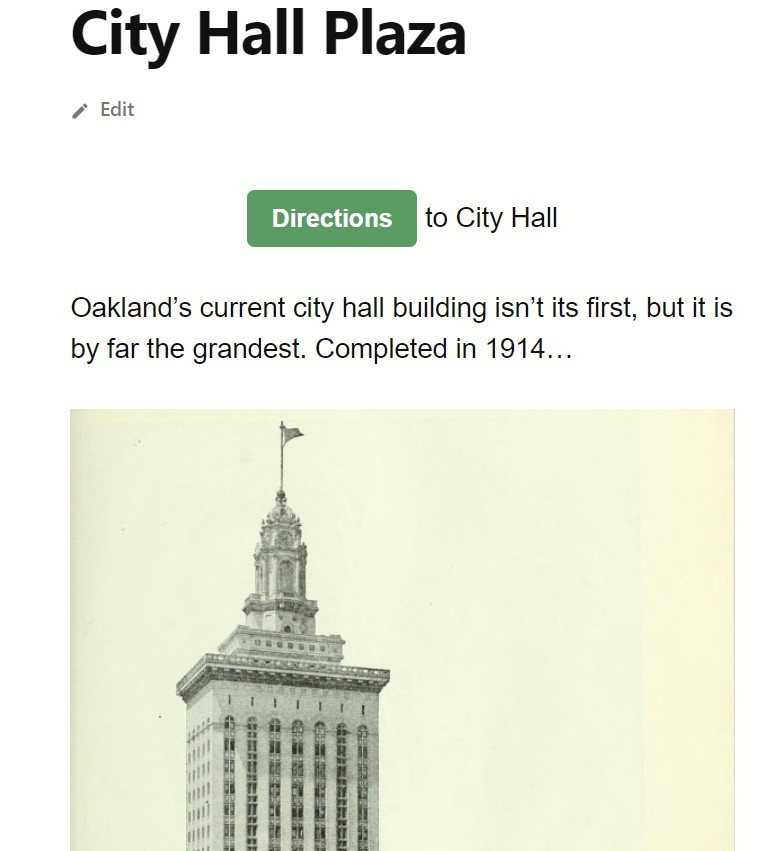
3. The title is how the stop will be listed in the tour. It should identify what the stop is about: a person, a mural, an event in history, etc. There’s no limit on the length, but it should be brief and to the point, like Freeway Encirclement or Delilah Beasley. For this example, use City Hall Plaza.
4. The content is up to you. You can include text, web links, images, audio clips, video—pretty much anything you can put on a regular web page. Just remember people need to be able to access it on a cellphone. And they need to look at or listen to it while they’re at the stop, so it shouldn’t take longer than 10 minutes or so. See the WordPress Editor for more on how to edit pages if you’re not familiar with WordPress.
Location, location, location
5. The location requires a little more explanation. The Address field is what shows near the Directions button for each stop, and the (Lat,Long) field is the latitude and longitude of exactly where you want the marker. You don’t need to know the latitude and longitude of each stop, though, because the website will help you find them.
6. The Address field is also a way to search for a location and find its latitude and longitude, or geocode it. Start by entering an address, cross streets, or the name of a location. For example, you could enter 1 Frank Ogawa Plaza, Oakland, CA or city hall, oakland, ca then press the Search+Geocode button.
NOTE: If the website can’t find the address you entered, it won’t update the map, and you’ll see a message Geocode failed: ZERO_RESULTS.
7. When the website finds the address, it places a marker on the location. Notice that it also fills in the latitude and longitude for you. But you might also notice that in this case the marker was placed on top of the city hall building—not an easy to place to get to.
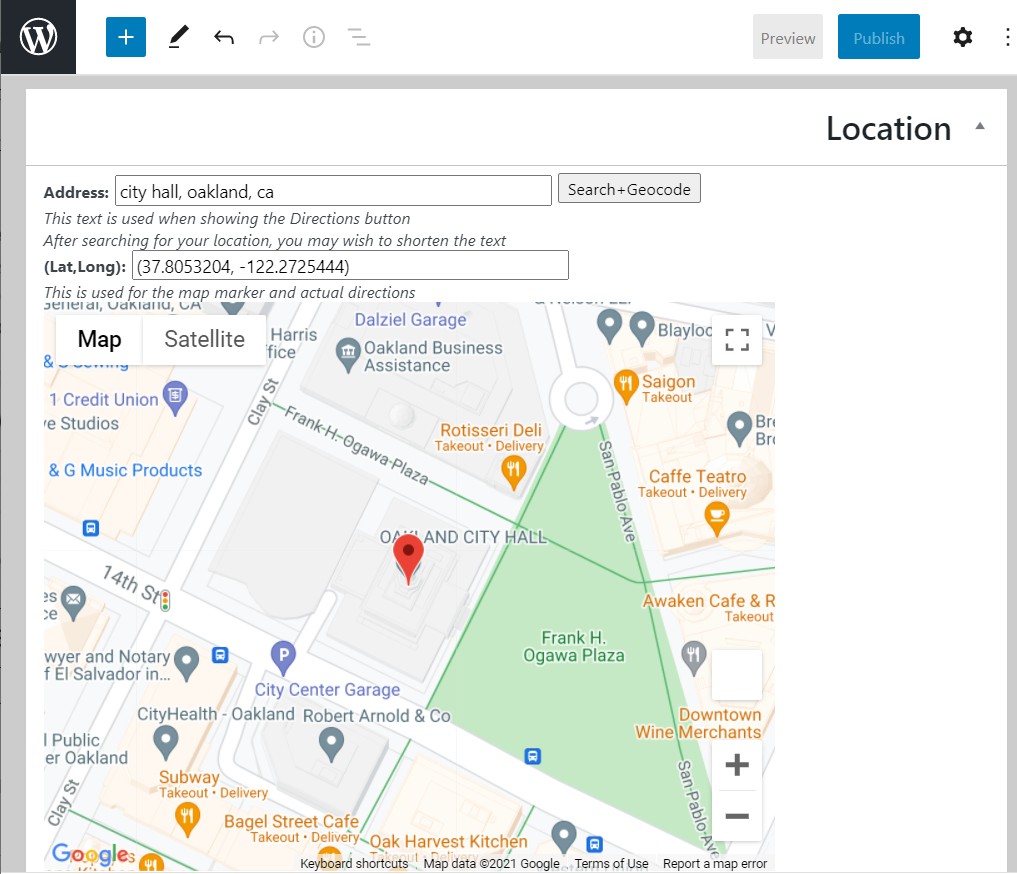
8. If you want, you can drag the marker to a nearby location where people can walk to. This deserves some thought: where do you want people to stand while learning about the stop? Is it better if they’re directly in front of a building or other location, or is it easier to see from across the street or a nearby corner? For urban murals, this is especially important—the best viewing location is often not right next to the mural.
9. In this example, the marker was dragged to the other side of Frank Ogawa Plaza, because it provides a nice view of the city hall building, and there’s a bust of Frank Ogawa and marker explaining who he was.
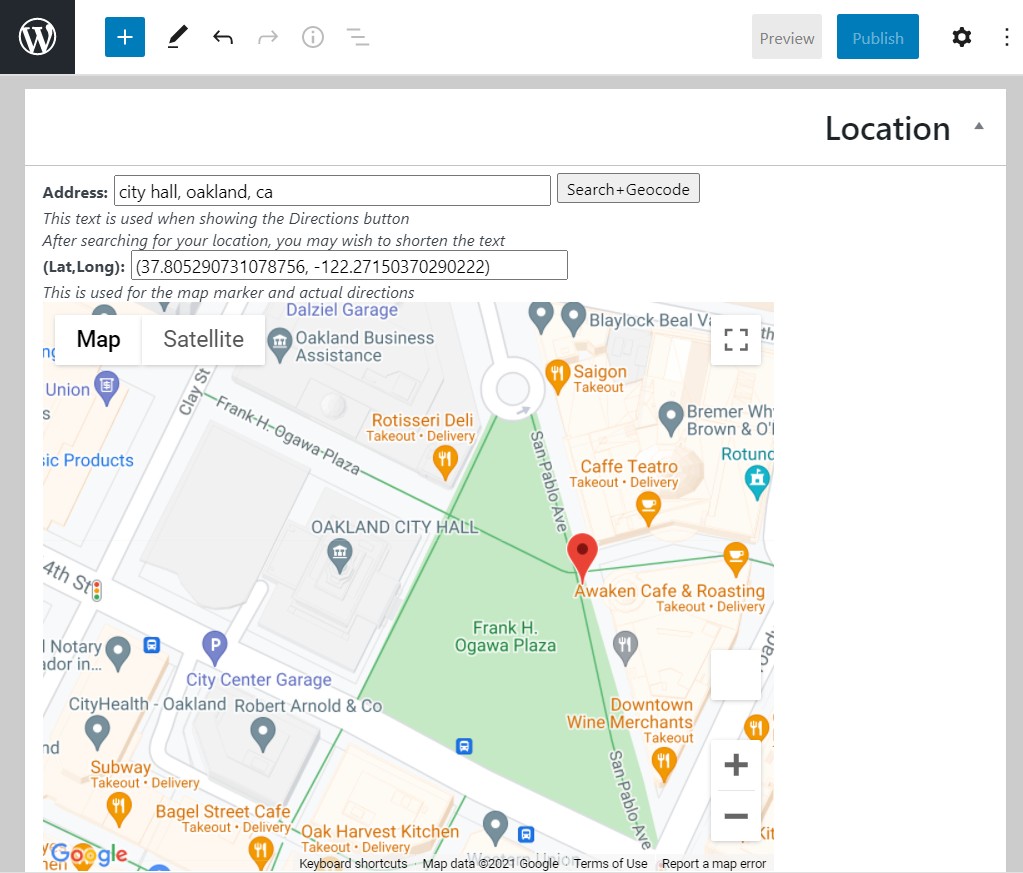
Notice that the latitude and longitude automatically updated to the new marker location. You can fine-tune the location by dragging the marker as needed.
10. The final thing for you to update is the Address field. If you’re doing a tour in downtown Oakland, people can safely assume you mean the city hall in Oakland. So you could shorten the text to 1 Frank Ogawa Plaza. But a lot of people may not recognize the street address, so you could use City Hall or some other name if you like. Recall that this is also what will appear next to the Directions button for the stop, so short and to the point is good. This is different than the title of the stop that you entered earlier.
NOTE: Do not press Search+Geocode again once you’ve changed the address, or it will try looking up the address again with your new name!
11. Now you can preview what the new stop will look like, including on a mobile device like a phone. You can keep making additional changes and preview what the results are until you’re happy. Don’t worry—you can make more changes later.
Next: Create a page for the tour
- Create your own walking tour
- Create a page for each stop
- Create a page for the tour
- Advanced features
- Test and publish your tour